
Disclosure: GeekSper may earn a commission from qualifying Amazon purchases made through links in this article, at no extra cost to you.
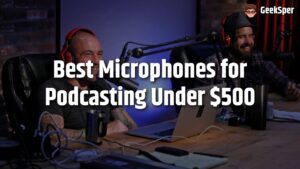
The best microphone for podcasting under $500 is the Shure MV7+ for most solo hosts, remote interviewers, and video podcasters. Its dynamic cardioid design, close speaking workflow, USB processing, headphone monitoring, and XLR connection make it easier to record a controlled voice in a normal bedroom or home office. The FIFINE AmpliGame AM8 is the best budget alternative, while the Elgato Wave:3 is the strongest choice for hosts who need software routing.
You do not need to spend the full $500 to produce an understandable, professional podcast. Room reflections, microphone distance, monitoring, speaking technique, and editing consistency often matter more than the final few hundred dollars of hardware. This guide compares verified manufacturer specifications, connection options, pickup patterns, monitoring features, included accessories, current Amazon listings, and recurring buyer feedback. We did not claim personal ownership or laboratory testing. Prices and availability can change, so use each product card to check the current offer.
If you are still learning how microphone distance and pickup direction affect a recording, read our guide to how microphones work. Our explanation of condenser microphones can also help you decide whether a sensitive condenser or close dynamic microphone fits your room.
Quick comparison: best podcast microphones under $500
| Microphone | Best for | Type | Connection | Monitoring |
|---|---|---|---|---|
| Shure MV7+ | Best overall solo podcast mic | Dynamic cardioid | USB-C and XLR | Yes |
| FIFINE AmpliGame AM8 | Best budget podcast mic | Dynamic cardioid | USB and XLR | Yes |
| Elgato Wave:3 | Best for remote shows and software routing | Condenser cardioid | USB-C | Yes |
| HyperX QuadCast 2 S | Best for flexible pickup patterns and video | Condenser, four patterns | USB-C | Yes |
| Razer Seiren V3 Mini | Best compact beginner setup | Condenser supercardioid | USB | No |
What matters when choosing a podcast microphone?
- Room behavior: Bare walls, windows, and hard floors create reflections that a sensitive microphone can capture.
- Speaking distance: A close microphone produces a stronger direct voice and reduces the amount of room mixed into the recording.
- Headphone monitoring: Direct monitoring helps you hear mouth noise, plosives, clipping, cable problems, and background sound before an episode is finished.
- Connection: USB is simpler for one host. XLR becomes useful for multiple speakers, physical mixers, and a growing studio.
- Mute and gain access: Physical controls are useful during live streams, remote interviews, and video recording.
- Mounting: A boom arm keeps the microphone close without occupying writing space or forcing poor posture.
- Editing workload: A microphone that captures less room noise can save more time than one that creates a slightly brighter raw sound.
Podcasting is not a contest for the highest sample rate. Speech intelligibility, consistent distance, low background noise, and comfortable monitoring have a much larger effect on the finished episode.
1. Shure MV7+ – Best overall microphone for podcasting under $500
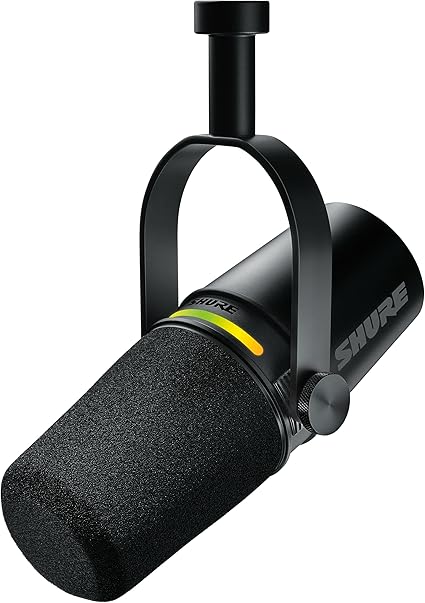

The Shure MV7+ is the most complete podcasting choice in this group because it can serve a beginner over USB and remain useful in a more advanced XLR studio. Its dynamic cardioid capsule is intended for close speech. That approach is helpful in untreated rooms because the host can use less gain and capture a stronger voice relative to fans, traffic, and wall reflections.
USB-C mode supports Auto Level, a real-time denoiser, Digital Popper Stopper, tone controls, compression, and a high-pass filter through Shure software. Auto Level is useful for a host who moves slightly while speaking, although consistent posture still produces the best result. The headphone output provides direct monitoring, and the touch panel gives quick control over mute and levels.
The published frequency response is 50 Hz to 16 kHz, and USB recording supports 24-bit audio at up to 48 kHz. Those specifications comfortably cover spoken voice. The more important benefit is predictable close capture. Position the microphone about 2 to 4 inches from the mouth, angle it slightly away from direct breath, and use a stable arm or stand.
XLR provides a sensible upgrade path for a two-person studio, mixer, or audio interface. Remember that the passive XLR output does not carry the same USB processing. If the denoiser, Auto Level, or Digital Popper Stopper is central to your workflow, record through USB or recreate that processing in software.
Who should buy the Shure MV7+?
- Solo hosts recording in a bedroom, office, or other untreated space.
- Video podcasters who need a reliable voice-focused microphone in frame.
- Creators who want USB simplicity now and XLR expansion later.
- Remote interviewers who need monitoring and automatic level assistance.
- Hosts who also record narration, courses, voiceovers, or livestreams.
Who should skip it?
- Hosts who refuse to keep the microphone close to the mouth.
- Buyers who need a complete stand or boom arm included.
- Multi-guest studios that already plan to buy several XLR-only microphones and a mixer.
Why choose it over the others? The MV7+ offers the best balance of room control, USB processing, monitoring, and long-term connection flexibility. The AM8 is far cheaper, but the Shure provides a more refined processing workflow and premium construction.
Pros: Dynamic cardioid capture, USB-C and XLR, direct monitoring, useful speech processing, durable metal housing, clear mute control.
Cons: Premium price, mount sold separately, close placement is necessary, USB processing does not affect passive XLR output.
2. FIFINE AmpliGame AM8 – Best budget podcast microphone

FIFINE AmpliGame AM8 USB/XLR Dynamic Gaming Microphone
The FIFINE AM8 is the practical choice for a new podcaster who wants a close dynamic microphone without paying premium prices. It includes USB and XLR connections, a headphone output, microphone gain control, monitoring control, mute, and optional RGB lighting. The lighting can be disabled when it does not fit the show.
Use USB for a simple one-host setup. Keep the end-address capsule close, reduce gain until ordinary speech is clear, and record a short test while typing, moving papers, and using the chair. The AM8 does not include the Shure processing suite, so physical placement and basic editing matter more.
XLR makes the AM8 more useful than many inexpensive USB-only microphones. A creator can begin with a laptop and later add an interface. Some USB controls do not behave the same way through XLR, so confirm which functions remain available before building a hardware workflow around them.
The AM8 is especially valuable when the budget must also cover a boom arm, headphones, recording software, and room treatment. Spending less on the microphone can produce a better complete system when the remaining budget solves placement and monitoring problems.
Who should buy the FIFINE AM8?
- Beginners building a complete podcast setup on a limited budget.
- Solo hosts working in an untreated or moderately noisy room.
- Creators who want USB now and an affordable XLR upgrade path.
- Podcasters who need direct monitoring and onboard controls.
Who should skip it?
- Hosts who want automatic level management and integrated denoising.
- Creators who plan to speak from far away.
- Buyers expecting a premium software ecosystem or broadcast-level finish.
Why choose it over the others? It leaves enough budget for the accessories and room improvements that make a podcast easier to record. Choose the MV7+ when software processing, finish, and refinement justify the higher cost.
Pros: Excellent value, dynamic cardioid design, USB and XLR, monitoring, physical gain and mute controls.
Cons: Less refined processing, close placement required, boom arm and XLR cable may be separate purchases.
3. Elgato Wave:3 – Best podcast microphone for software routing

The Elgato Wave:3 is the strongest option for a podcast that combines microphone audio with remote guests, browser clips, music, video calls, or live-stream elements. Wave Link can place these sources into separate mixes, which is more valuable than another small improvement in raw microphone tone when a show depends on routing.
The cardioid condenser captures a detailed voice in a quiet, controlled space. Clipguard provides additional protection when a speaker suddenly becomes louder, and the capacitive mute avoids recording a hard mechanical click. The headphone output and front control make monitoring and level adjustments convenient.
A condenser captures more room information than a close dynamic setup. Use the Wave:3 in a room with soft furnishings, controlled fan noise, and a close speaking position. A heavy noise-reduction plug-in can make reflective audio sound unnatural, so solve the room and distance first.
Software routing requires preparation. Select the intended input and virtual channels in the recording app, video-call service, and streaming software. Save a repeatable template and record a local backup whenever a remote interview matters.
Who should buy the Elgato Wave:3?
- Remote interview hosts who manage calls, clips, and music.
- Live podcasters and video creators who need separate audience mixes.
- Solo hosts with a reasonably quiet recording room.
- Creators who value Clipguard, monitoring, and silent mute.
Who should skip it?
- Hosts recording in a loud or reflective room.
- Buyers who want XLR expansion.
- Creators who prefer a simple input without virtual audio routing.
Why choose it over the others? Choose the Wave:3 for audio management. The MV7+ is a better voice-first choice for an untreated room, but the Elgato can simplify a complex remote or live show.
Pros: Wave Link routing, Clipguard, direct monitoring, capacitive mute, detailed cardioid capture.
Cons: USB only, room-sensitive condenser, software has a learning curve.
4. HyperX QuadCast 2 S – Best for video podcasts and flexible patterns

The HyperX QuadCast 2 S is the most visually complete desktop package in this group. It includes a stand, detachable shock mount, USB-C cable, USB-A adapter, headphone monitoring, a large top mute surface, extensive RGB lighting, and four selectable pickup patterns.
Cardioid is the right mode for a solo host. Bidirectional can capture two people seated opposite each other, while omnidirectional can collect a room discussion. Those shared-microphone modes are convenient, but separate close microphones normally provide better level control, editing flexibility, and rejection between speakers. Treat the extra patterns as options for occasional formats, not a replacement for a multi-mic studio.
The included shock mount helps reduce some desk vibration, although it cannot remove every keyboard press, table bump, or stand movement. Keep gain moderate, bring the microphone closer, and use a separate arm when the included desktop position places the capsule too far away.
The strong RGB presentation suits a video podcast where the microphone is deliberately visible. Turn lighting down or disable it when it distracts from the host, guest, or set design.
Who should buy the HyperX QuadCast 2 S?
- Video podcasters who want a visually distinctive microphone.
- Creators who value an included stand and shock mount.
- Hosts who occasionally need cardioid, bidirectional, or omnidirectional pickup.
- Users who need direct monitoring and an obvious mute state.
Who should skip it?
- Audio-only hosts who do not value RGB or multiple patterns.
- Small desks where the microphone blocks notes or a camera frame.
- Noisy rooms where close dynamic capture is easier to control.
Why choose it over the others? It offers the best ready-made visual desktop bundle and the greatest pattern flexibility. Choose separate dynamic microphones for a serious two-person studio.
Pros: Stand and shock mount included, four patterns, monitoring, easy mute, extensive RGB.
Cons: Large footprint, condenser sensitivity, multiple patterns can encourage poor shared-mic technique.
5. Razer Seiren V3 Mini – Best compact microphone for beginner podcasting

The Razer Seiren V3 Mini fits a creator who wants to begin recording without turning a small desk into a studio. Its 14 mm condenser capsule uses a supercardioid pattern, supports recording up to 24-bit/96 kHz, includes tap-to-mute, and has built-in shock absorption.
The compact body is easy to keep below a monitor or camera. The supercardioid pattern is focused, but it also requires correct orientation and can have some rear pickup. Record a test while moving around the desk so you understand which direction produces the cleanest voice.
The main limitation for podcasting is the lack of a headphone output. Monitoring through the computer can introduce delay, and recording without monitoring makes it easier to miss clipping or background problems. The microphone is best for short beginner episodes, narration, and a quiet desk rather than a demanding live production.
Who should buy the Razer Seiren V3 Mini?
- Beginners with limited desk space.
- Creators recording in a quiet room.
- Hosts who value tap mute and simple USB setup.
- Video podcasters who want a small microphone in frame.
Who should skip it?
- Hosts who require zero-latency headphone monitoring.
- Creators planning an XLR studio.
- Anyone recording in a loud room or far from the microphone.
Why choose it over the others? Choose it for size, simplicity, and a low barrier to entry. The AM8 is the better budget podcasting tool when monitoring and room control matter more.
Pros: Compact, supercardioid pickup, tap mute, built-in shock absorption, straightforward USB connection.
Cons: No headphone jack, no XLR, no hardware gain dial, sensitive to room and placement.
Best podcast microphone by use case
- Best overall: Shure MV7+ for controlled solo voice, processing, monitoring, and future XLR expansion.
- Best budget pick: FIFINE AM8 for a capable complete setup without consuming the accessory budget.
- Best for remote guests: Elgato Wave:3 when software routing is central to the show.
- Best for video presentation: HyperX QuadCast 2 S when lighting and visible hardware support the set design.
- Best for a small desk: Razer Seiren V3 Mini for a quiet beginner workspace.
USB or XLR for podcasting?
USB is the right starting point for most solo podcasts. It avoids an interface, extra cables, additional gain staging, and a larger equipment budget. A single USB microphone with direct monitoring can be reliable enough for years of episodes.
XLR becomes useful when a show adds two or more local speakers, a hardware mixer, separate headphone feeds, or outboard processing. It also makes it easier to replace one component without changing the entire signal chain. The Shure MV7+ and FIFINE AM8 support both paths, so a creator can begin with USB and expand later.
Dynamic or condenser for a home podcast?
A dynamic microphone is generally easier in a normal untreated room because it encourages close placement and lower gain. That often reduces the amount of fan noise, traffic, and room reflection mixed with the voice. A condenser can sound detailed and open, but it reveals more of the space and demands careful placement.
Neither type automatically fixes a bad room. Hangings, curtains, bookshelves, rugs, soft furniture, microphone direction, and distance all influence the recording. A close $50 dynamic microphone can require less cleanup than an expensive condenser placed in the middle of a reflective room.
Podcast accessories worth budgeting for
- Boom arm: Maintains close distance without occupying the writing area.
- Closed-back headphones: Help detect mouth noise, clipping, and remote-call problems without speaker bleed.
- Pop filter or windscreen: Reduces air bursts from P and B sounds when placement alone is insufficient.
- Shock isolation: Helps with desk vibration, although it cannot compensate for repeated table impacts.
- Soft room materials: Curtains, rugs, and filled shelves can reduce harsh reflections.
- Backup recording: A local track or secondary device protects important remote interviews.
Before buying an expensive microphone, reserve enough money for monitoring and stable positioning. A premium mic on a poor stand at the far end of the desk is rarely the best use of a $500 budget.
Podcast recording setup checklist
- Place the microphone close and slightly off-axis from the mouth.
- Set input gain while speaking at the loudest realistic episode volume.
- Leave headroom so laughter and emphasis do not clip.
- Monitor through headphones and listen for fans, cables, and desk vibration.
- Record 30 seconds of normal speech before every important episode.
- Confirm the correct input in the recording and call software.
- Record separate local tracks for multiple speakers when possible.
- Save a repeatable session template with track names and routing.
- Back up the raw files before editing.
Frequently asked questions
What is the best microphone for podcasting under $500?
The Shure MV7+ is the best overall recommendation because it combines close dynamic capture, USB processing, direct monitoring, and XLR expansion. The FIFINE AM8 is the better choice when the total setup budget must also cover headphones, a boom arm, and room improvements.
Do I need two microphones for a two-person podcast?
Two close microphones usually produce better control than one shared microphone. Separate tracks make it easier to balance speakers, remove noise, and edit interruptions. A bidirectional or omnidirectional microphone can work for occasional conversations but is less flexible.
How close should a podcast microphone be?
Start a dynamic microphone about 2 to 4 inches from the mouth and a condenser around 4 to 8 inches away. Adjust after listening for plosives, proximity effect, room sound, and consistent level. Keep the capsule slightly off the direct breath path.
Is a USB microphone professional enough for podcasting?
Yes. A quality USB microphone can produce a publishable solo podcast when placement, monitoring, recording levels, and editing are controlled. XLR is mainly valuable for expansion, multiple local speakers, mixers, and component flexibility.
Should I record at 24-bit?
Recording at 24-bit provides useful level headroom and is a sensible default when the microphone and software support it. Sample rate is less important for speech than clean gain, stable distance, and avoiding clipping.
Final recommendation
Buy the Shure MV7+ if podcasting is a serious long-term project and you want the best blend of home-room control, processing, monitoring, and upgrade flexibility. Choose the FIFINE AM8 for the strongest value and use the remaining budget for headphones, a boom arm, and room improvements. Choose the Elgato Wave:3 for remote or live shows that need routing, the HyperX QuadCast 2 S for a visible multi-pattern video setup, or the Razer Seiren V3 Mini for a simple compact beginning.
The best podcast microphone is the one you can keep close, monitor confidently, and use the same way for every episode. Consistency saves more editing time than buying features that never become part of the recording workflow.