
A vocal booth is an enclosed space designed to reduce echo, room reverberation, and outside noise, giving you cleaner, better-sounding recordings. It’s an essential accessory for any home studio, whether you’re singing, recording podcasts, or doing voiceover work.
This guide covers what a vocal booth is, why it’s worth building, the materials involved, the steps to construct one, and the different types available.
What Is a Vocal Booth, Exactly?
A vocal booth is a room designed to cancel echo, decay, and outside 6 while protecting your recording from unwanted sound. The term works similarly to a photo booth: just as a photo booth uses an enclosed setup to control lighting and background, a vocal booth uses soundproofing materials to control the acoustic environment and limit outside noise pollution.
While recording, you want to minimize outside interference as much as possible. The most effective way to do that is by building a vocal booth that absorbs, reflects, or blocks unwanted sound from entering the recording space.
Why Build a Vocal Booth?
The sound of your voice is shaped heavily by the space you’re recording in. In an untreated room, you’ll often get unwanted reverb and echo, along with extra ambient noise picked up in the recording.
Building a vocal booth and recording inside it solves much of this. Once you’re happy with how your voice sounds in your recordings, you can use that same booth consistently and know your results will stay reliable.
It’s worth noting that you can’t eliminate echo entirely, only control it. Sound-absorbing materials are the main tool for reducing echo to a manageable level inside your booth. If background noise is a recurring issue even before you get to a full booth build, our guide on how to stop microphone from picking up keyboard noise covers a more immediate fix.
How to Build the Best Vocal Booth
You don’t need an unlimited budget to build a vocal booth that sounds good. In many cases, you can repurpose materials you already have around the house.
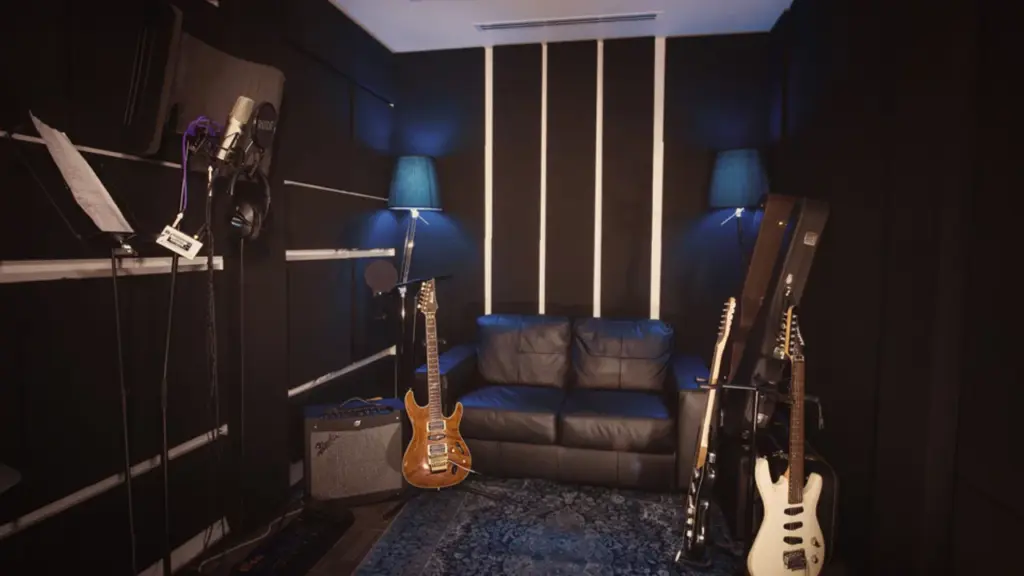
If you have an empty room available, a few acoustic panels can turn it into a genuinely effective vocal booth. Start by soundproofing the walls so outside noise doesn’t seep through. Once the room is sealed, install one or two acoustic panels on each of the four walls, choosing panel types based on the specific sound issues you’re trying to address.
Determining the Size of the Room
| Room Dimension | Metric | Resonance |
|---|---|---|
| 8 feet | 2.44 meters | 141 Hz |
| 7 feet | 2.13 meters | 161 Hz |
| 6 feet | 1.83 meters | 188 Hz |
| 5 feet | 1.52 meters | 226 Hz |
| 4 feet | 1.22 meters | 283 Hz |
| 3 feet | 0.91 meters | 377 Hz |
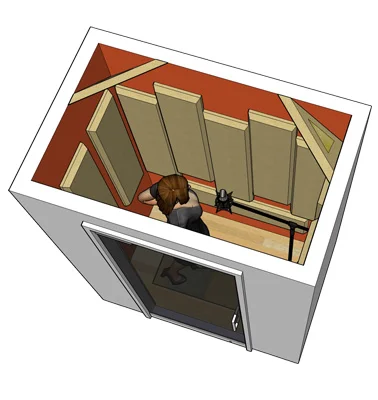
Some booths are built mainly for speaking, which means they only need to be large enough for one or two people. Others need to accommodate instruments like drums or guitars, which requires more space. A typical vocal booth ranges from about 3 by 4 feet up to 4 by 6 feet (roughly 92cm by 122cm to 122cm by 155.5cm).
Room dimensions also affect resonance frequency. An 8-foot room resonates around 141Hz, a 6-foot room around 188Hz, and a 4-foot room around 283Hz, with smaller rooms generally resonating at higher frequencies. Pairing a well-built booth with the right microphone for vocals makes the biggest overall difference in recording quality.
Wall and Floor Construction

If you’re building your booth inside an existing studio space, it’s best to place it in a separate room, and adding rubber underlayment beneath the floor helps reduce vibration.
Wall and ceiling construction can vary in how much isolation it provides. A single layer of gypsum board on each side represents the minimum level of soundproofing. Adding an additional layer of material increases mass on the wall, and since sound is energy, more mass means more energy is required for sound to vibrate through and pass to the other side.
Materials for Constructing Your Vocal Booth
Denser materials generally provide better soundproofing. Core materials worth considering include:
- Quality pine timber or heavier wood
- Acoustic plasterboard
- Rockwool insulation
- Acoustic mastic
- A solid wood door
- Neoprene door seal
- Acoustic tiles
Steps to Build a Vocal Booth at Home
1. Select the Right Absorptive Panels for the Walls
The interior of a vocal booth can be built from almost anything, but the materials on the outside determine how effectively it blocks sound. Choose an effective soundproofing material for this layer.
2. Construct the Frame
The frame gives your booth its structural shape. Wood, steel, or a combination of both work well, with 16-gauge C-channel and galvanized steel conduit being two of the most commonly used materials.
3. Install Insulation
Fiberglass and Rockwool are the two most common insulation choices. Fiberglass tends to work best in smaller booths, like those typically found in home studios, while Rockwool is a better fit for larger booth builds.
4. Construct the Door Frame and Hang the Door
The door frame should be made from sturdy wood, since the door is one of the most important parts of any vocal booth. It needs to block outside noise effectively while still being easy to open.
Most doors use solid wood at least 1 inch (2cm) thick. Plywood can work as an alternative, as long as it includes at least three layers.
5. Install the Window
If your studio doesn’t already have a window, you can add a glass pane to the door to let in light while still controlling sound. If a window already exists, use acoustic-grade plywood for the surrounding walls and seal any gaps carefully.
For better insulation, use double-paned glass, ideally two panes of half-inch (12mm) thick glass with an air gap between them.
6. The Ceiling
A grid ceiling is a straightforward, budget-friendly option you can build from scratch. To make one, attach furring strips to the metal frame and stretch quarter-inch (6mm) wire mesh across it.
7. Paint Your Vocal Booth
Painting interior surfaces with sound-absorbent paint helps reduce remaining echo or reverb. With a well-built booth, you may not need additional sound treatment inside at all.
8. Put It All Together
Once construction is complete, position the booth in your studio and adjust as needed until you find the right acoustic sweet spot. A vocal primer paired with at least two coats of sound-absorbent paint can make a noticeable difference in the final sound.
Types of Vocal Booths
Permanent Vocal Booth
This is the most efficient setup overall. Construction follows the same general process described above, and it can be placed in an isolated room or in your home with proper power and flooring for convenience.
Portable Vocal Booth
A portable booth can be carried wherever you need it and set up quickly without much hassle. It follows similar construction principles as a permanent booth but uses lighter materials, making it easier to move.
Temporary Vocal Booth
This setup works well for singers who move between different studios or producers’ homes. Construction follows the same general process, but the booth is designed to be transportable. It takes a bit more time to set up but can be rebuilt fairly easily each time.
DIY Vocal Booths
Plenty of people wonder whether they can build their own vocal booth instead of buying one. With some research and planning, it’s entirely possible to build one yourself at a relatively low cost.
Modular Vocal Booths
These cost more than a DIY or portable setup, but they offer better sound quality and longer-lasting insulation. If you plan to record consistently in the same space, a modular booth can be a strong long-term investment.
FAQ
What is a vocal booth?
A vocal booth, also called a sound or isolation booth, is a small room within a recording studio designed to minimize reverberation and sound leakage. Its purpose is to isolate your vocals from other sounds in the studio, resulting in much cleaner recordings.
How much will a vocal booth cost to build?
Costs vary depending on where you source materials and how much you spend on wood quality. If you already have some materials on hand, a basic build can start around $500, though costs rise with higher-end finishes.
What does a vocal booth look like?
Shape and size depend on your specific needs and preferences. An ideal vocal booth isn’t overly large, but it should still offer enough room to move comfortably while recording.
Conclusion
If you want to improve recording quality in your studio or home setup, building a vocal booth is one of the most effective investments you can make. Consulting an acoustics specialist, or someone experienced with similar builds, can help you avoid common mistakes along the way.
If you’re serious about your recordings, taking the time to build a solid booth pays off in the quality of your final results.
For more on getting the most from your recording setup, see our guides on how to adjust microphone sensitivity, what a microphone preamp is, and what an audio interface is.